dotnet MAUI public key pinning
When it comes to client-side security, mobile apps can be a double-edged sword. On the one hand, the software is on a user-controlled device, so security is out of your hands. On the other hand, that device will probably connect to any old public wifi that it can get its hands on. Man-in-the-middle attacks are a definite risk.
Luckily, we can improve protection against these by using certificate pinning, or public key pinning. Instead of saying that a certificate that matches a domain suffices, we want to make sure that it is in fact the right back-end that we are talking to. By pinning the public key of our back-end api certificate, essentially having a local copy of sorts, and comparing that with the actual public key for each request that we make, we can be more sure that it is in fact our back-end, and not some spoofed version of it.
Caution: this requires proper maintenance. If you ever change your certificate on the back-end side and you forget to update your client app, it will no longer be able to communicate with your back-end.
Here’s how to do it in your dotnet MAUI application for Android and iOS. First off, we need the public key of our certificate. Preferably hashed with SHA256. This can be easily achieved using openssl. The following command will give us the hashed public key: openssl s_client -connect www.yourdomain.com:443 | openssl x509 -pubkey -noout | openssl rsa -pubin -outform der | openssl dgst -sha256 -binary | openssl enc -base64.
Now we will take this hash and configure both of our platforms to verify the keys. There is multiple ways to achieve this. You can implement your own custom implementations of the native NSURlSessionHandler (iOS) and AndroidMessageHandler classes, and provide them using an implementation of IHttpsClientHandlerService. But there is an easier way.
Both the Android and iOS platforms offer a built-in way to add certificate pinning. These work just fine with MAUI. Why write your own code when it’s already available and built-in. For Android add a file called network_security_config.xml in a folder xml in your Android resources folder. Which can be found under Platform/Android/Resources. If the xml folder does not exist yet, create it.
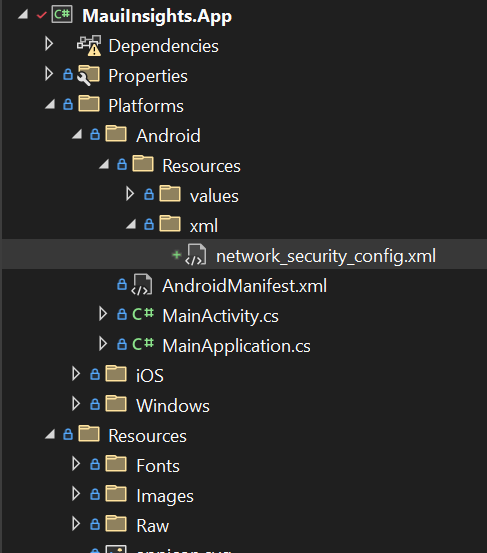
Add the following to the file:
<?xml version="1.0" encoding="utf-8"?>
<network-security-config>
    <domain-config>
        <domain includeSubdomains="true">example.com</domain>
        <pin-set expiration="2022-12-31">
            <pin digest="SHA-256">7HIpactkIAq2Y49orFOOQKurWxmmSFZhBCoQYcRhJ3Y=</pin>
        </pin-set>
    </domain-config>
</network-security-config>
Replace example.com with your domain, and replace the pin with the public key hash that you just made. The pin-set element is a collection, when you plan on updating your certificate, add the updated public key to this set and roll it out to your users before updating it server-side. This way, your users won’t experience any downtime.
Find the official docs on certificate pinning for Android here.
For iOS, we add the following to the Info.plist file, which can be found under Platforms/iOS/Info.plist.
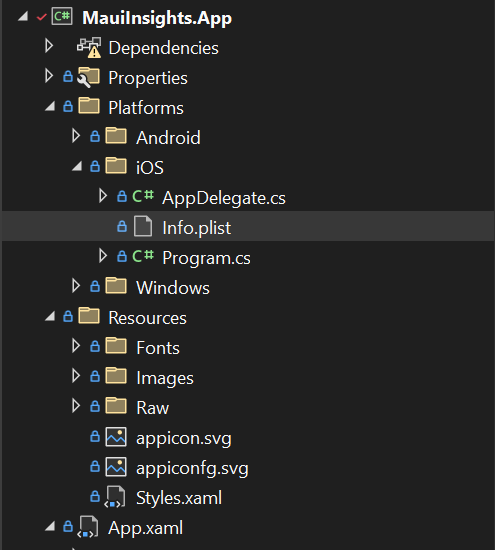
<key>NSAppTransportSecurity</key>
<dict>
    <key>NSPinnedDomains</key>
    <dict>
        <key>example.org</key>
        <dict>
            <key>NSIncludesSubdomains</key>
            <true/>
            <key>NSPinnedCAIdentities</key>
            <array>
                <dict>
                    <key>SPKI-SHA256-BASE64</key>
                    <string>7HIpactkIAq2Y49orFOOQKurWxmmSFZhBCoQYcRhJ3Y=</string>
                </dict>
            </array>
        </dict>
    </dict>
</dict>
Again NSPinnedDomains is a collection to which you can add multiple items. To support a future/backup key, simply add an additional <key>example.org</key> with the other hash. You can find more about this in the official iOS documentation here.
Once you have these changes in place, you are all set. You can simulate an invalid public key by changing a letter in your hash, and attempting to connect to your back-end. Both Android and iOS should throw a native exception telling you the pinned key does not match. You have now made it harder for a man-in-the-middle to spoof your back-end to get valuable data from your app!